My Juniper Raised Bed Garden Project
Lessons from the front lines
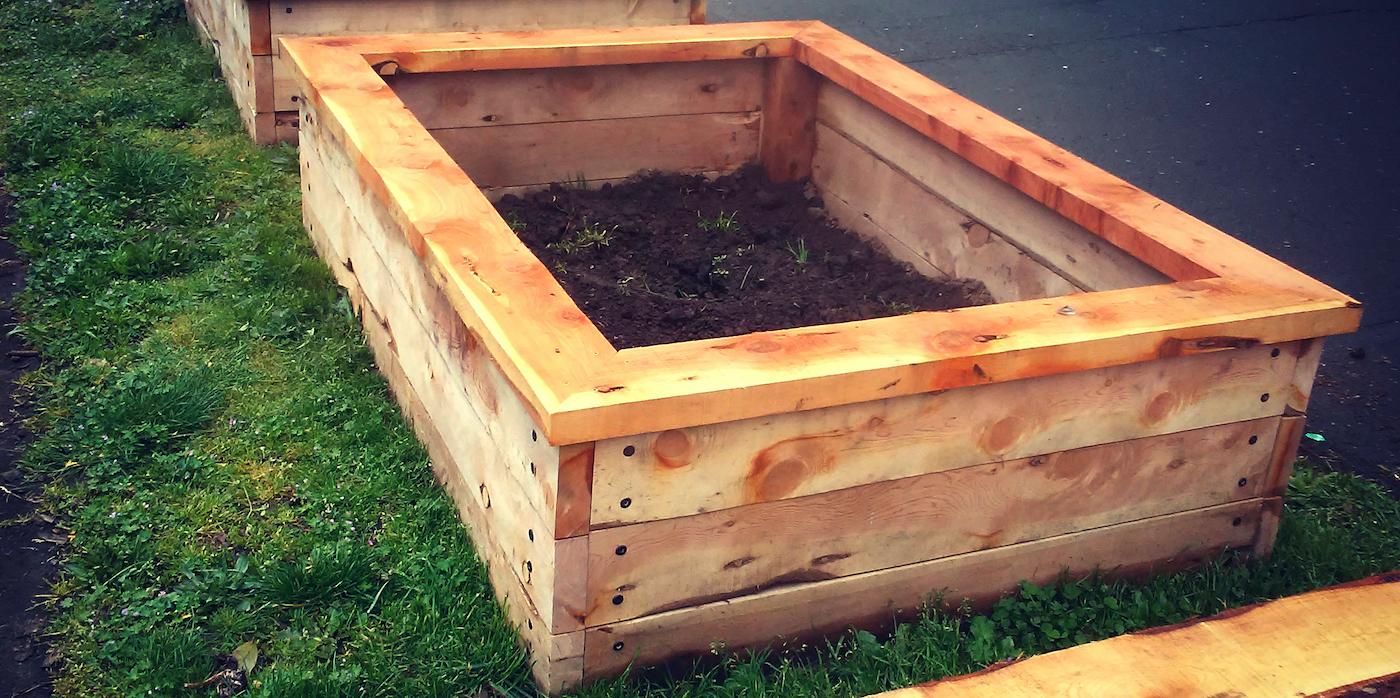
There's the old adage about the cobbler's children never having shoes...well, recently my family disproved that ancient fable by building our very own Restoration Juniper raised beds. We're quite pleased with the results! We love the organic, wabi sabi look that juniper provides -- and after such an undertaking, we love that we won't need to rebuild them for a very, very long time. Turns out building raised beds is a lot of hard and heavy work!
We used rough 2x6x10 juniper to build beds that are 4' x 6' rectangles, with 4x4 vertical posts to support and secure the beds. We planned our beds to optimize the yield of the lumber with minimal waste.
We went three boards high, so the beds are 18" above ground. Because of their location along the parking strip of our street, we chose this height to protect the beds from the errant noses and raised legs of passing dogs, but lower heights would work just as well in other locations.
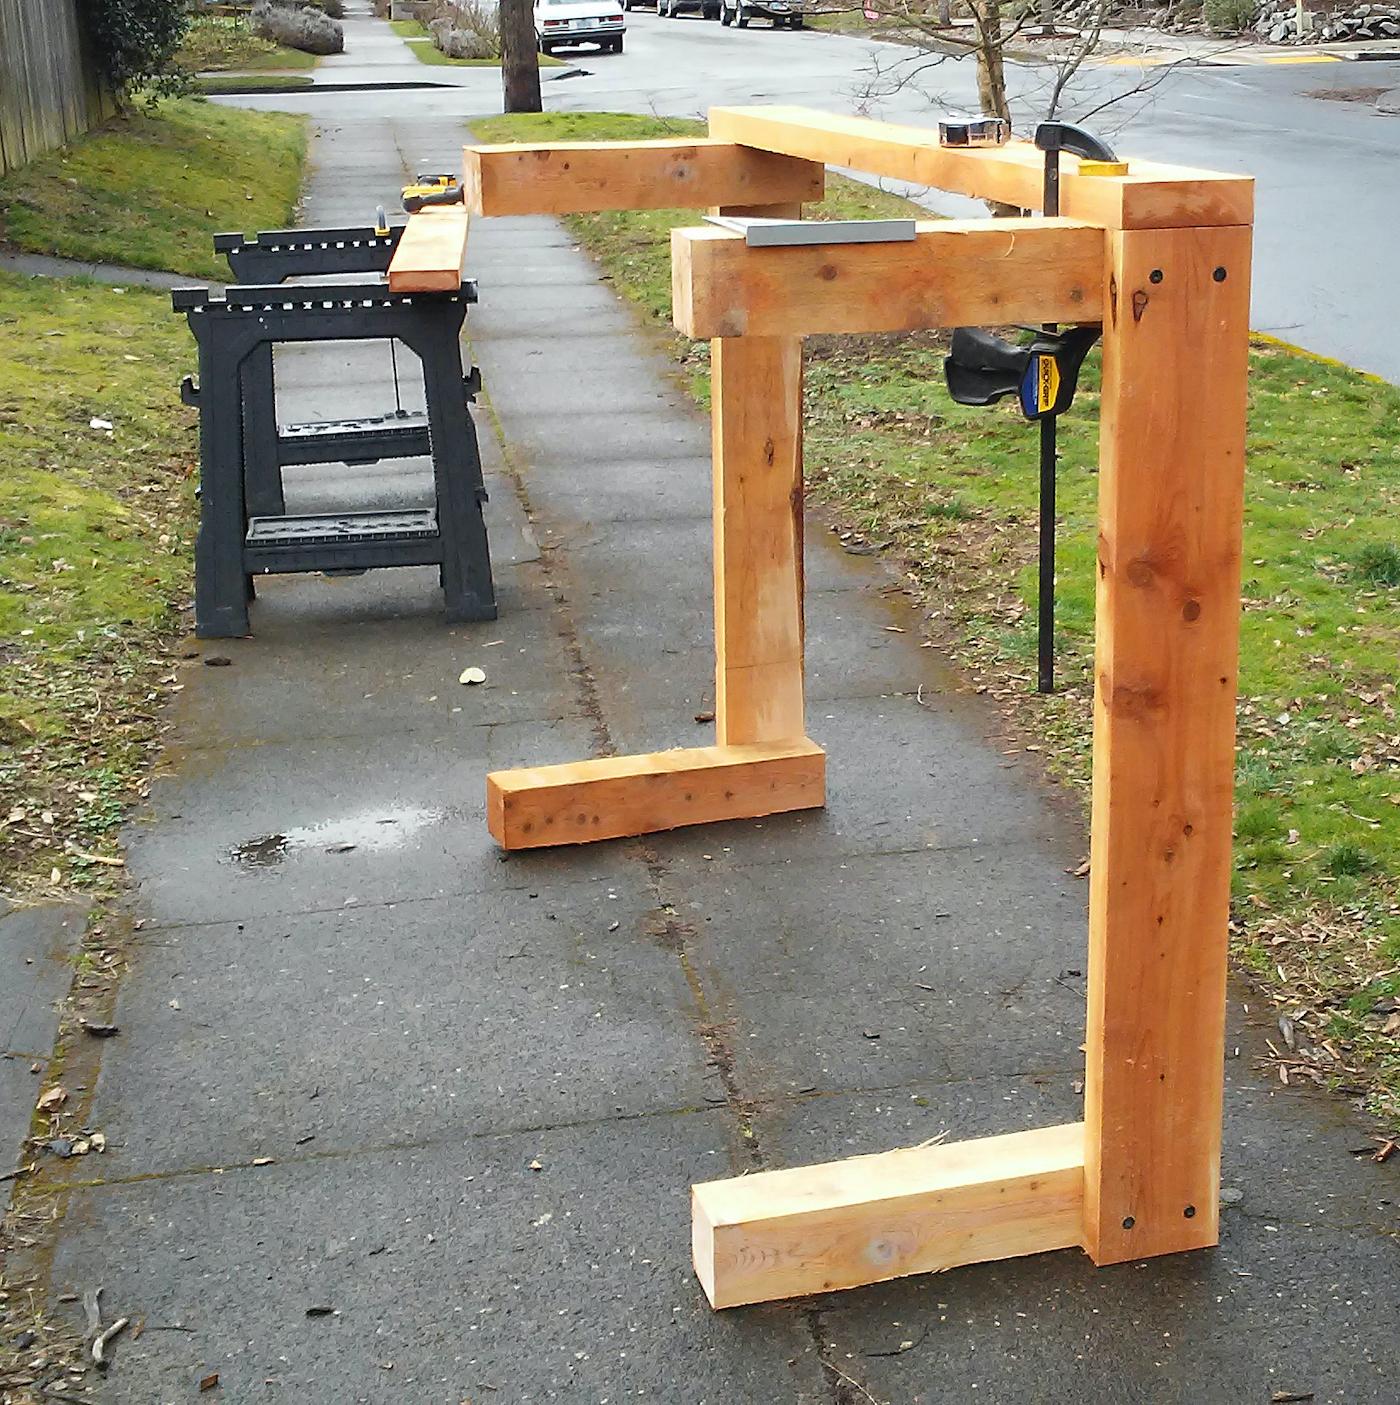
To build the beds, we first trimmed all the lumber to the proper uniform lengths. Next, we attached 2x6 members to two 4x4 posts, then did the same for the opposite end of the bed, and then secured those two sides together with more 2x6, as shown in the photo. The beds got very heavy quickly, so we ended up pre-drilling all of our holes and screwing the lumber together (as shown in photo at left), then removing pieces of the 2x6 sides so that we could move and properly position the beds. Then, once the beds were in their final locations, we re-attached all the 2x6 to the sides.
We also added the decorative cap along the top, complete with carefully mitered corners. My husband really wanted this artistic touch because of the beds' location at the front of our home, and we agree that it completes the look nicely.
To secure the lumber on the sides of the beds, we chose black Headlock screws, which provide a decorative touch that we like. For the caps along the top of the beds, we used wood-toned exterior screws to secure the caps on top so they inconspicuously blend into the wood.
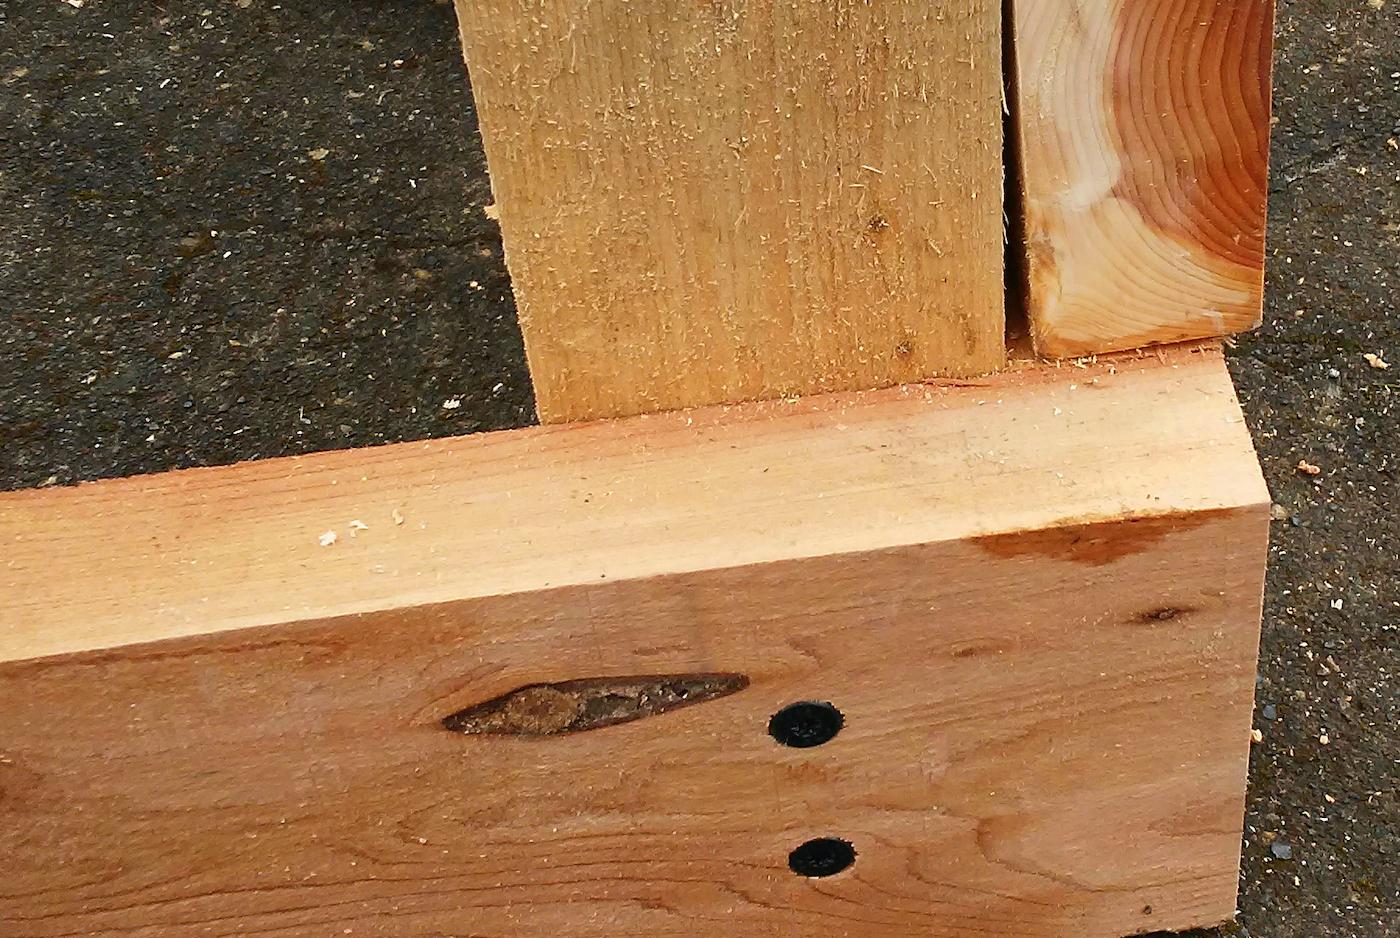
Juniper has a lot of elasticity in the wood, so in a few cases we had to flex the wood back into straight lines and then secure it (see photo at right). Once secured, it stays put. Juniper also holds screws exceptionally well, so it isn't apt to warp over time, as other species can.
One of the other surprising qualities of the wood was variations in the thickness and widths. Some boards were up to 1/16" thicker than others. We don't feel that this negatively impacts the look of the beds at all, but it was a surprise when we began assembling them. Because of the way the lumber is milled, this is a feature that should be expected; it could be avoided by using surfaced juniper instead.

Project Support
Find local sustainable wood products in Portland Oregon

Our Why
We exist to promote Good Wood in the Pacific Northwest and beyond
Sustainable Northwest Wood
2701 SE 14th Ave.
Portland, OR 97202
Monday - Friday
8am to 5pm

© 2025 Sustainable Northwest Wood

Our nonprofit parent company is Sustainable Northwest